You should be honest with yourself; even though your house has storage room, your things often got to garage. These piled up items slowly get in the way and probably you cannot park the vehicle without bumping into boxes. Now that you are determined to have your garage back, what should you do first?

1. SET TIMELINE
Depending on the number of items you put inside the garage, the time limit for cleaning project will be different. If you are eager to finish the whole thing within certain timeline, consider to call professional help. Otherwise, decluttering a garage might take around a week if you do it by yourself. Still, you need to set strict timeline. Make it a week at the maximum to do the whole jobs.
In general, garage cleaning could be divided into several big chunks. First, you need to take out the whole items in the garage and sort them out. Decide whether you want to use them, throw or donate them away. Next, you need to clean up the whole space, including the floor, walls and ceiling. Last, you need to organize the remaining items you chose to keep.
2. DECLUTTER ITEMS
It is time for the first job; decluttering and sorting items out. If there are a lot of things in your garage, then start from the boxes near to garage door. It will be easier for you to pull out these boxes or items. Try to clear the floor as best as you could. To prevent double work, prepare three separated areas beforehand. While you are bringing things out, put them on specific category.
Sometimes you cannot decide whether to throw things away or keeping it. Here are some simple guides to help you decide. Ask yourself; will you use this item again later? Is it a rare item you cannot find in the neighborhood? Is this item working well? If your answer is “yes”, then these belongings are meant to keep.
Now you see several items that you are no longer use. Think about the reason to put them in the garage. Is it there because the item breaks and you are going to fix it? Is it too big to dispose but you have no time? For both conditions, you instantly put them to disposal. Never hold onto things you want to “fix”. If there are too many items to handle, consider to rent a dumpster.
So, what are the criteria for donation items? It is simple. They will be items that are working well but you won’t use any longer. Good examples are sport items your children no longer use. It could be bicycle, football shoes, etc. Take photos and upload them online. You could also personally call the donation center to pick up the items.
3. CLEAN UP THE SPACE
After sorting items out, you need to clean up your garage. This is important step before bringing items back to the space. It is possible to do it on one day. The key is starting early and work efficiently. For example, don’t start from the floor just because it is easier to reach. You should start cleaning from the top then going to the bottom.
Look at your ceiling and wipe up the spider webs. For your safety, wear a mask. Don’t forget to dust the shelves and cabinets. If you put a refrigerator in the garage, then wipe it with damp cloth. After the upper part is thoroughly cleaned, you might need to sweep the floor before continuing the project.
Now you have to clean the walls. Check for any sign of mold or oil stain. Treat both cases first before doing general cleaning. For the mold, use vinegar or bleach diluted water. Dip sponge or clean cloth in it and wipe the mold area gently. Make sure all the areas are wiped properly. For the oil stain, absorb the dampness with cat litter. Sweep the cat litter. Splash dish soap and rub the area with wire scrub.
For the other parts of the wall, you could use mild detergent to clean them. Don’t forget to rinse them well. Help them to dry by wiping the surface using microfiber cloth. Turn on the floor fan and set it to the walls. It will make the walls dry up faster. You might need two to four hours.
Now that your walls are cleaned, you need to pay attention to the floor. If there is any sign of crack or broken parts, you might want to fix them first. If you continue to clean, the water might be trapped inside the crack and create further damage. Clean up process for the floor is similar to walls. After the floor is dried, you could add vinyl layer for easier maintenance.
4. ORGANIZE ITEMS
Now it is time to get to the last part. Previously you have sorted “keep” items. It is time to organize them well. Remember that the purpose of the whole cleaning project is giving your garage its function. You want space for your vehicle to park without bumping into things.
First of all, you need to sort your items into several categories. This way, you will know how much space you need to keep them. For example, the gardening tools should be grouped together. Take screwdrivers and maintenance stuffs away and put them together in a tool box. If you have some camping equipment, make sure to fold them neatly for store.
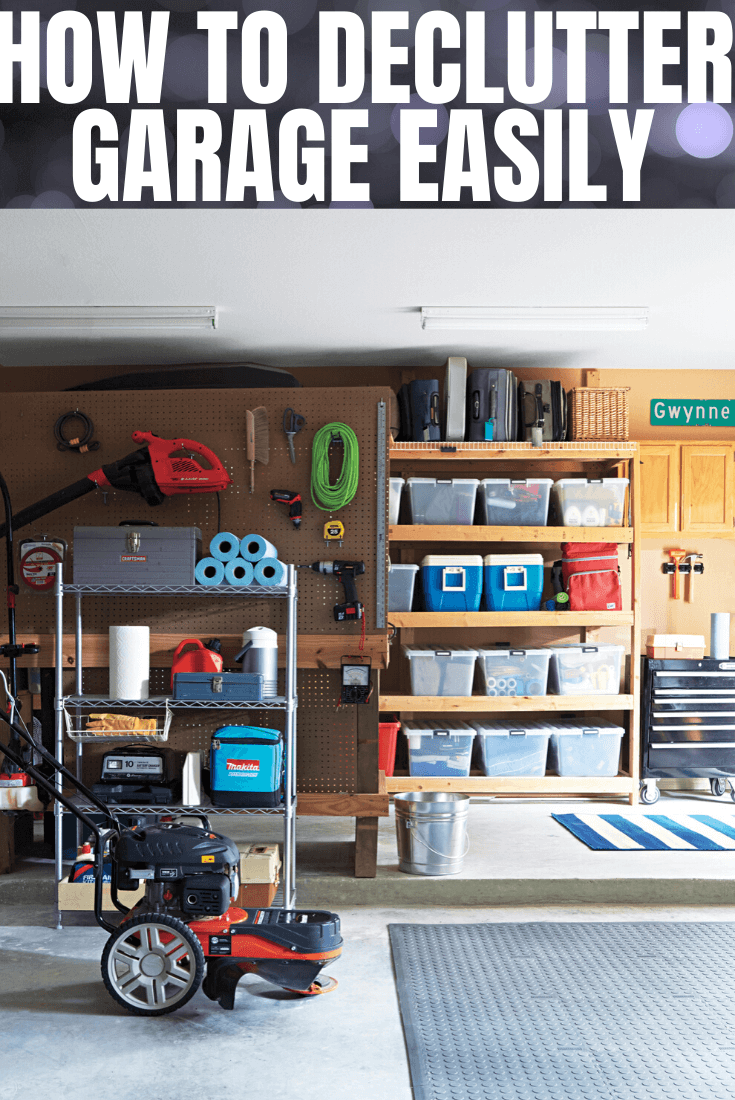
Second, install the organization shelves. If you already have one, then start organizing the items. The ones you put on display should be something you use often. It could be tool box, car shampoo, wipes, etc. Items you rarely use should be too far away from the shelves. Should you use non-transparent box, don’t forget to write some labels.
What if you don’t have enough space on the shelves? Then you could make container space on the ceiling. Remember that it is only possible when you have enough gap from your car top to the ceiling. You could find a lot of DIY project for this plan.


