Do you want that professional, reflective finish on your garage floor? Whether you work with your car often or not, it’s always nicer to see a car in a showroom rather than a dirty garage. Epoxy flooring can help you achieve that dream – and we will help you reach that dream step by step.
What Is Epoxy Flooring?
When we are talking about garage flooring, there are two types you can choose from. The first one is coverings, which are applied to sit on top of the floor, including tiles, mats, and rolls. Since you just have to put them on top of the actual floor, they are easy to apply and remove, perfect for a cheap and short term solution.
The second one is coating, which is liquid and therefore applied using brushed and paint rollers. The time, effort, and money required for coating are exponentially larger than coverings. Plus, different types of coating require different working conditions and drying time which result in a sturdier finish, perfect for those who are looking for a long term solution for their garage flooring issues.
Epoxy belongs to the coating type. And among the type, it is considered a very popular choice given that most showrooms and a lot of repair shops use this reflective finish. Another thing it is famous for is the notoriously long time it requires to finish – since epoxy uses two coating steps, it can take days for the whole coating to dry completely.
Why Epoxy Flooring?
Despite looking so posh, epoxy flooring is rather cheap compared to other flooring options. Though the epoxy itself usually comes in tubs, the price is usually measured per square foot – resulting in a professional flooring for a cheap price.
If done properly, they can be so durable they can last for decades. Since it is water and heat resistant, the floor became easier to clean from gasoline, oil, and any other chemical possible. It will not stain, too. Besides, since it is reflective, it increases the visibility of the garage, which checks the safety and working ease for the space.
Sounds like a god-send? Well, maybe not so much after we consider the time it needs. As we mentioned before, epoxy coating needs several steps which can take days. Plus, the chemical smell is strong when drying, so there’s a need to mind the ventilation of the space we are coating.
Lastly, as reliable as it is, it can crack if handled roughly (usually dealt by wheels from toolboxes and carts). And when it cracks, all we can do is reapply the epoxy to regain the smooth surface.

How to Choose Epoxy Flooring Kit
There are two things we need to consider when choosing epoxy coating, which are:
1. Color
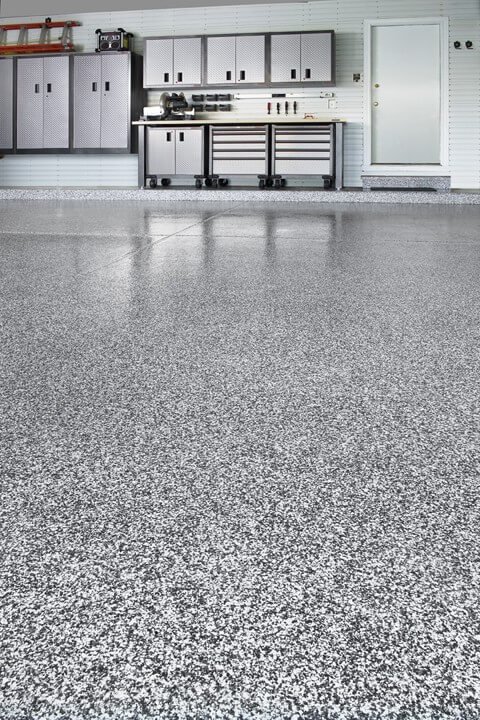
Epoxy color options are limited, but that doesn’t mean every choice is good. Usually, the color options ranged in monochrome shades (white, gray, black) and natural colors (beige, brown). Since we are coating a garage, it is better to choose brighter colors for visibility. After all, brighter colors reflect the lights more, and dark ones the opposite.
However, that doesn’t make off-white a good choice – it will expose dirt and dust that the garage will look dirty most of the time. This also applies to pure black. Settle for something in between, especially those in brighter tones. Light gray and beige are the common choices.
2. Type
Epoxy has several types to consider before choosing. The first one is epoxy-improved solutions – which are more like a mixture of paint with some epoxy rather than actual epoxy. There are paint and water base in this type. Generally, they are cheaper than real epoxy and only need one coat.
However, they wear off in a few years, so be ready for reapplying the coat in the future. The second one is real epoxy, which required two coating steps. There are high solids epoxy (100% epoxy, takes time to dry) and polyurea coating (more expensive, but takes less time to dry). They are more durable than the first time but generally more labor-intensive.

How to Apply Epoxy Coating on Your Garage Floor
If you had chosen the epoxy solution and want to apply it yourself, follow these steps to ensure that it is applied properly:
- Prepare the concrete floor. This includes covering cracks and holes, clearing dirt and stains, and stripping sealant (if you seal the floor already). This step must be done properly, as the condition of the concrete floor determines the endgame of the coating. Make sure that the concrete floor is rough but even.
- Cover the edge of the wall foundation using plastic and tapes. Then, wash the concrete floor by scrubbing it with an all-purpose cleaning solution and rinse with water. Then, scrub it with an etching solution to make sure the concrete floor is perfectly clean. Let it dry at least for four hours (don’t apply epoxy on damp concrete.)
- Open a can of epoxy paint and mix it thoroughly with epoxy hardener. Let it sit with a loose cover but don’t expose it to sunlight for 30 minutes (This is meant to trigger chemical reaction. The can should feel warm after the wait.)
- Use a brush to apply the epoxy to the borders first, then pour it onto a tray and work with the roller. Paint a section of the floor and sprinkle the color flakes while the epoxy is still wet. Repeat until all parts of the floor are covered within two hours (otherwise, the coat won’t cure properly.) Let dry for 12 to 24 hours.
- Mix the topcoat and hardener and let it sit the same way as the paint. Just like the first coat, paint the border first with a brush then use a paint roller to cover the rest. Let dry for 24 to 72 hours (in 24 hours, it can handle walking. In 72 hours, you can drive your car into the garage.)
Coating epoxy on your garage floor takes a lot of time, money, and effort. However, as they are the sturdiest coating for garages there is, it’s hard to regret when the result is waterproof, easy to clean, and gave some magic to make your garage looking professional!


Nice article. I was looking because about 20 years ago I applied an “epoxy” coating to my 3 car garage. However, I did not apply a topcoat as I did not know and nothing was said about that to me (or in the epoxy instructions). I found that in the summer (I am in TX where it gets hot) the epoxy lifted or stained where the tires rested. Thinking of re-doing it now but wonder what I had to do to the existing floor to prepare it. Any thoughts? Thanks.