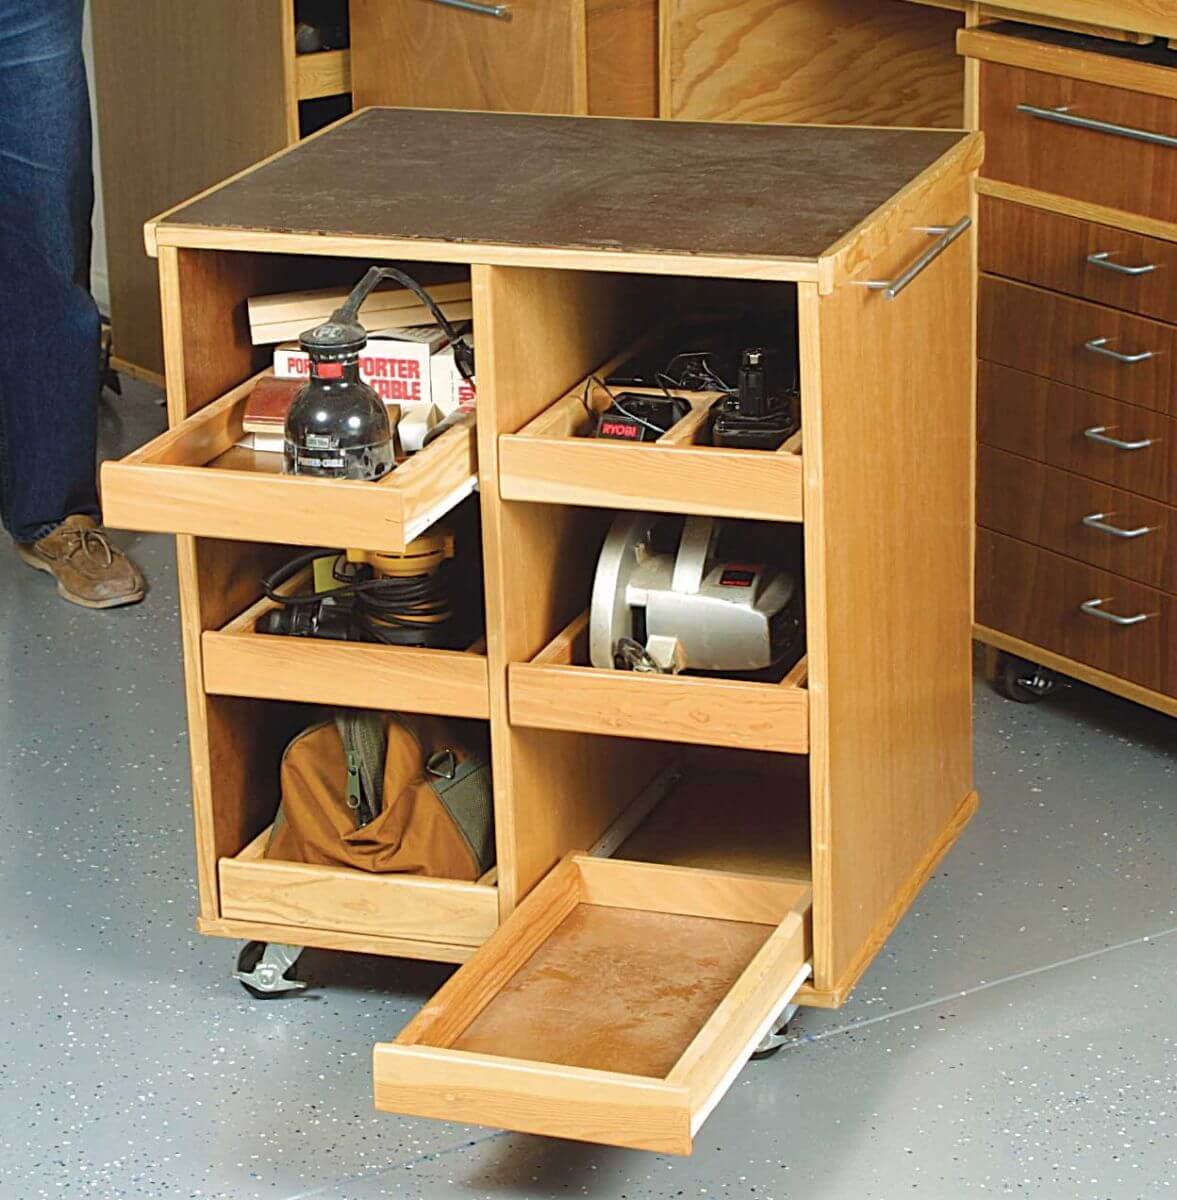
Are you looking for something to do this weekend aside from tidying up the garage? If your answer is “yes”, then this activity is suitable for you. Later on, the workbench you made could be used to make more DIY products. All you have to do is following the easy steps below about how to build a garage workbench. Check it out.
Read also: HOW TO CHOOSE BEST GARAGE LIGHTING.
Prepare the Tools and Supplies
The first thing you should be ready, prepare the tools and supplies to next step how to build your own garage workbench. How could you work without preparing the proper tools? Bring these items to your working area: circular saw, kreg jig, driver, drill, clamps, sander, nail gun and jig saw. Do small test to make sure each of them could work well.
The next preparation is listing the supplies and purchase them. To make the workbench, you will need MDF board. Purchase eight boards of 2 x 4 x 8 inches, two boards of 2 x 6 x 8 inches, two boards of 4 x 8 x ¾ inches, and five boards of 1 x 2 x 8 inches.
While you are at the store, don’t forget to purchase casters, screws, lock washers and nails. This plan requires 5 inches casters, one for each bottom corner.
For the screws, there are different types to buy: two pieces of ½ inch wood screws and ½ inch pocket hole screws. Grab also ¼ inch lag screws, ¼ inch lock washers, sixteen pieces each. Add also a pack of ½ inch brad nails.
Cut the Parts
First thing to do is cutting the MDF boards you have bought. If you don’t have any spare, do a pre-test to make sure that the boards could provide all the cuts needed.
The guideline provided will cover several different parts; top, bottom and middle frame, legs, table top and middle and bottom shelf. Separate the cuts for each group to help you in assembling the parts.
The top frame cuts should be taken from 72 inches and 33 inches board. The dimension is 2 x 4 and the cuts should be two and three pieces respectively. Bottom frame calls for similar number of cuts, but the material is thinner; 66 inches and 27 inches.
For the middle frame, use the same dimension to make the cuts. There should be three cuts of 11 inches, two cuts of 32 ¼ , 23, 3 ½ and 3 inches and one cut of 25 ¼ inches.
The legs require two dimensions: 2 x 4 and 2 x 6. Cut four pieces of 2×4 on 25 ¾ inches board. Cut four more pieces each using 2×6 dimension on 25 ¾ and 5 inches material.
The table top use 72 and 36 MDF with 1 x 2 dimension. Each material should provide two cuts of 45-degree miter cuts on both ends. Bottom shelf take 66 and 30 MDF with 1 x 2 dimension. Every material must be cross cut and trimmed. Make sure to have two pieces. The middle shelf needs two pieces of 32 ¼ x 15 inches MDF.
It also needs 1×2 dimension cut from 23 inches material (cross cut), 28 ½ inches (45 degree miter cut) and 30 inches (45 degree miter cut).
Related: HOW TO BUILD A MAN CAVE GARAGE.

Image: paoson.com
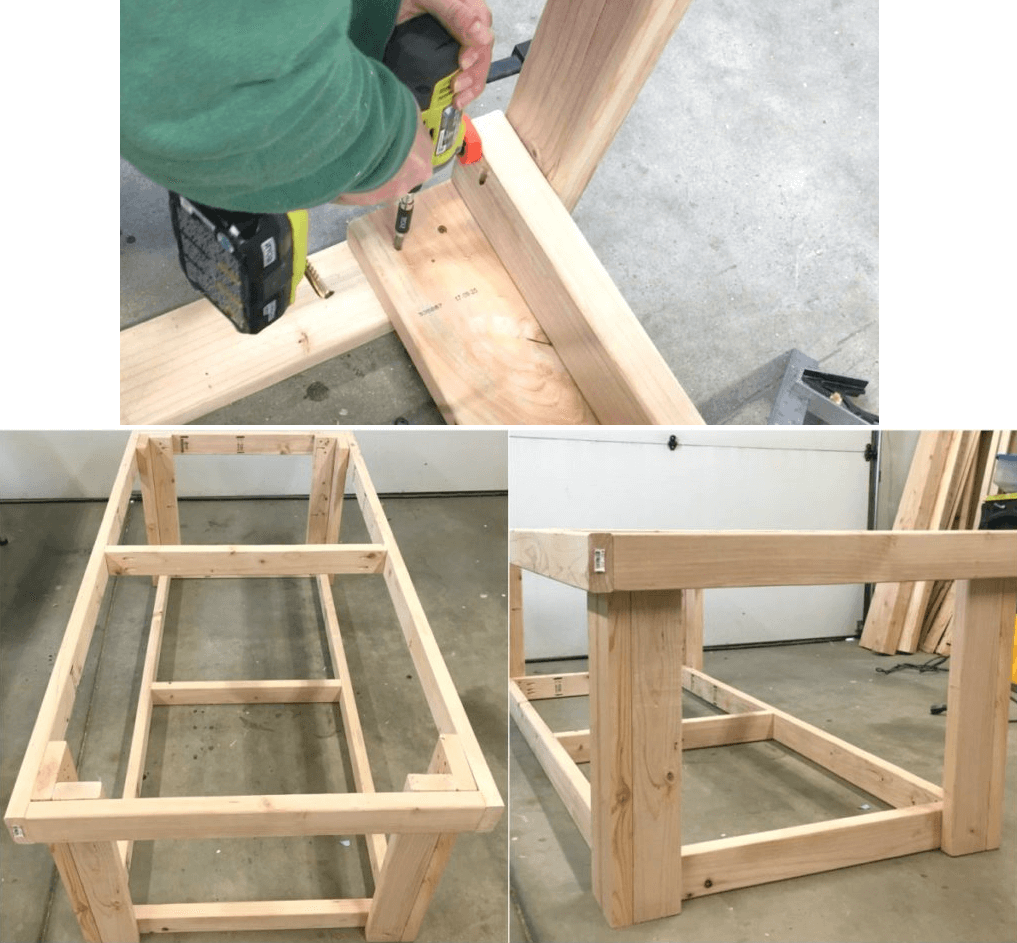
Step 1: Build the Frames
The first thing to do is building the top and also bottom frame. It helps you to set the frame of the workbench. A little tip: set the Kreg Jig to 1 ½ inches thickness.
Using the tools, you need two pocket holes on every corner of the frame. Dry fit the cross support then put them together using the 2 ½ inch screws prepared for pocket hole.
Check whether your product resembles the sample picture. If it is good to go, don’t forget to smear some wood glue to strengthen the bond in the joints. Put it aside to dry while preparing the next part of the workbench.

Image: dreamdesigndiy.com
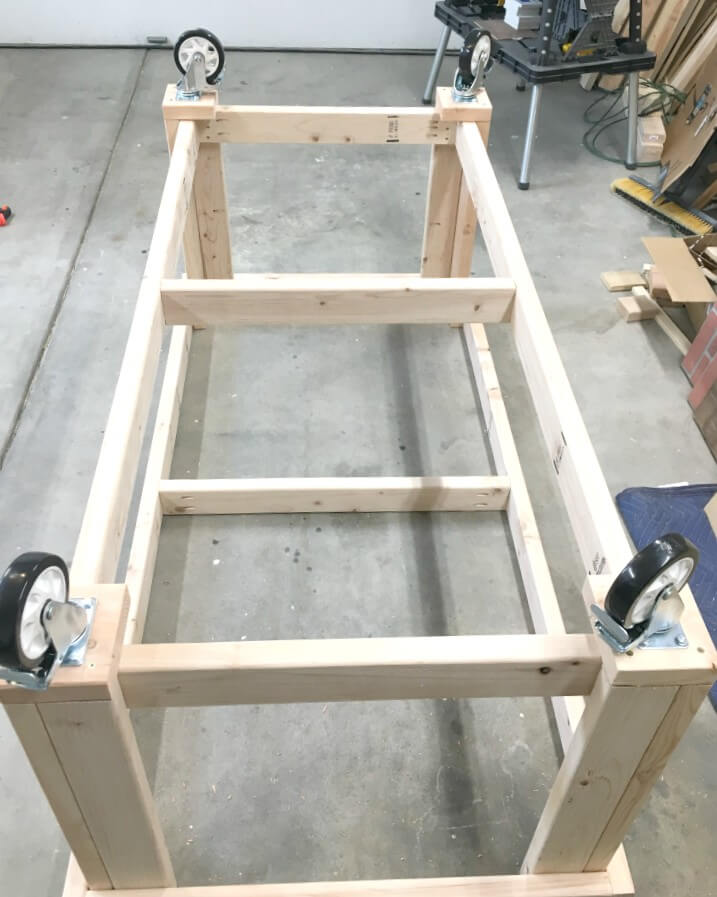
Step 2: Make the Legs
Now it is time to make the legs. You will need three holes on each end of the prepared leg cuts. To get these three holes, you need to make two on both sides first.
For the middle holes, make it about two inches depth only. Repeat the process to all leg cuts. Connect the 2×4 cuts and 2×6 cuts usng 2 ½ inches pocket hole screws.
Put one leg in the outer side of bottom frame and inner side of the top frame. Lock them on place by installing 2 ½ inches wood screws. It will be more convenient to re-arrange the frame position before drilling holes and installing the screws.
Step 3: Install Casters
Your workbench should be able to move around the place, so you need to install casters. Mark the spots where later you will drill the screws. Pre-drill the holes by using 2 ½ inches screw.
Use the holes and screws to attach the casters in each corner of the workbench. You might need to install ¼ inch lock washers and ¼ inch lag screw to support the installation.
Make sure to put on the casters’ brakes. You won’t want the workbench to move along the vibration made by the circular saw. After that, flip the unfinished workbench to standing position.
Read also: HOW TO BUILD GARAGE WORKSHOP IN 7 EASY STEPS.
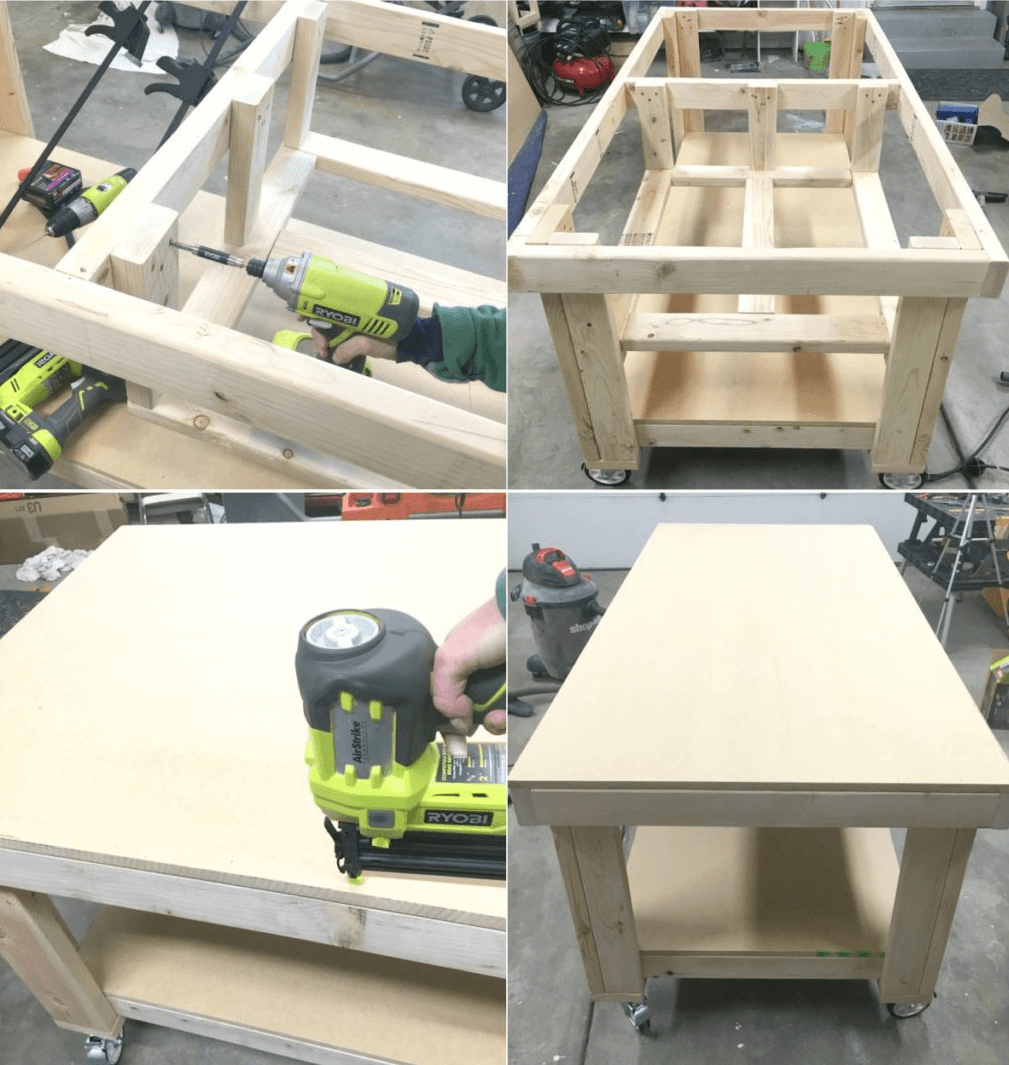
Step 4: Assemble Board and Middle Shelf
The board that should be installed prior to the shelves is the bottom one. It could be attached by using the 1 ½ inches brad nails. Move onto the middle frame and start drilling the ends to get two pocket holes.
Assemble the 23 and 25 ¼ inches middle shelf cuts to its place. Glue them together using 2 ½ inches pocket hole screws and glue for wood material. Allow it to dry for a while.
Then, you can move to the upper shelf. Assemble the supporting cuts and the braces. Pick appropriate screw size to attach the cuts; 1 ½ inch brad nails and 1 ½ inches wood screw.
Bring the braces and middle frame together. Install clamp tool to hold them then pre-drill to connect these parts. At last, you could install the MDF board on the top of the workbench frame. Fasten it by screwing 1 ½ inches nails.
OK, that is the step by step for you if you find information and guides about how to build a garage workbench. I hope it will help you. If you have some ideas, recommendation, and other tips, you can use the comment box below.


