Garage door spring is an essential component that enables you to open and close it easily. However, the spring can get damaged. It can be because of a manufacturing defect, but it can also be because of the humidity of the garage that makes the spring rusty, or any other reasons.
If that happens, it is suggested that you seek professional help, especially if you don’t have enough experience. But, it doesn’t mean that you cannot replace the spring by yourself.
With proper tools and these guides, you can replace the spring on the garage door. However, you still need to consider some things before you do this project.

Replacing Garage Door Spring
Replacing the garage door spring by yourself can be very hard and it can cause great harm if you don’t know what you are doing. It is not entirely impossible, but you need to note that a single torsion spring works under considerable tension.
Meaning that it can be very dangerous because the spring itself can break and it can cause minor and severe cuts. Knowing the risk is very important to help you decide whether to replace it by yourself or calling the professional.
If you have made up your mind and you still want to replace the garage door spring by yourself, you need to prepare the tools and follow these guides.
Read also: REASONS WHY GARAGE DOOR REMOTE NOT WORKING
A. What You Need
Before you begin the project, you need to prepare some tools and materials needed. The tools you need to prepare are wrench sets, winding bars, sockets, ratchet sets, rags, locking pliers, hammers, cordless drills, clamps, and adjustable wrenches.
For the materials, you will need lift cables, double-life tension springs, and bottom brackets. Since this project can be very dangerous, it is advisable for you to prepare safety glasses, leather gloves, and a sturdy ladder.
It is also a must to prepare a proper set of winding bars and you can buy the professional one for $25. It will help you to do the job smoothly and it will protect you from the danger of this project.
B. How to Install Single Torsion Spring on Garage Door
After you have prepared the necessary tools and materials, you can begin the project by following these steps.
1. Clamping the Door to the Track
The first thing that you need to do is to clamp the locking pliers to the track over the rollers. It is an important step to begin the project because it will stop the door from shooting up.
It will also be a great protection for you, especially when you install the new spring later on. After that, you need to pull the cord and loosen up the door opener before starting to repair the garage door spring.
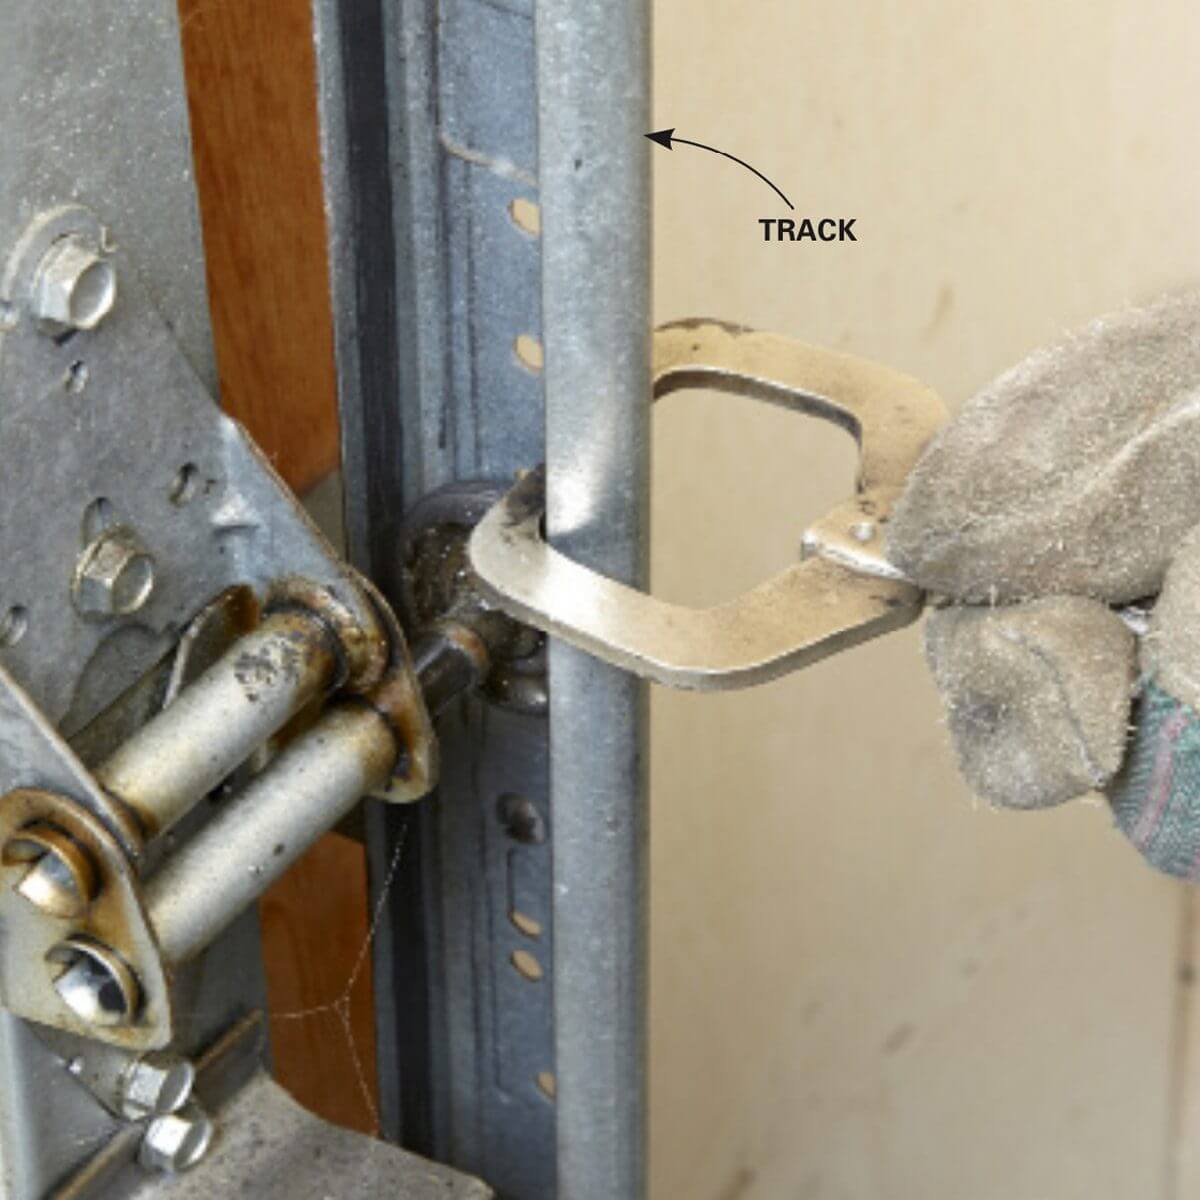
Image: familyhandyman.com
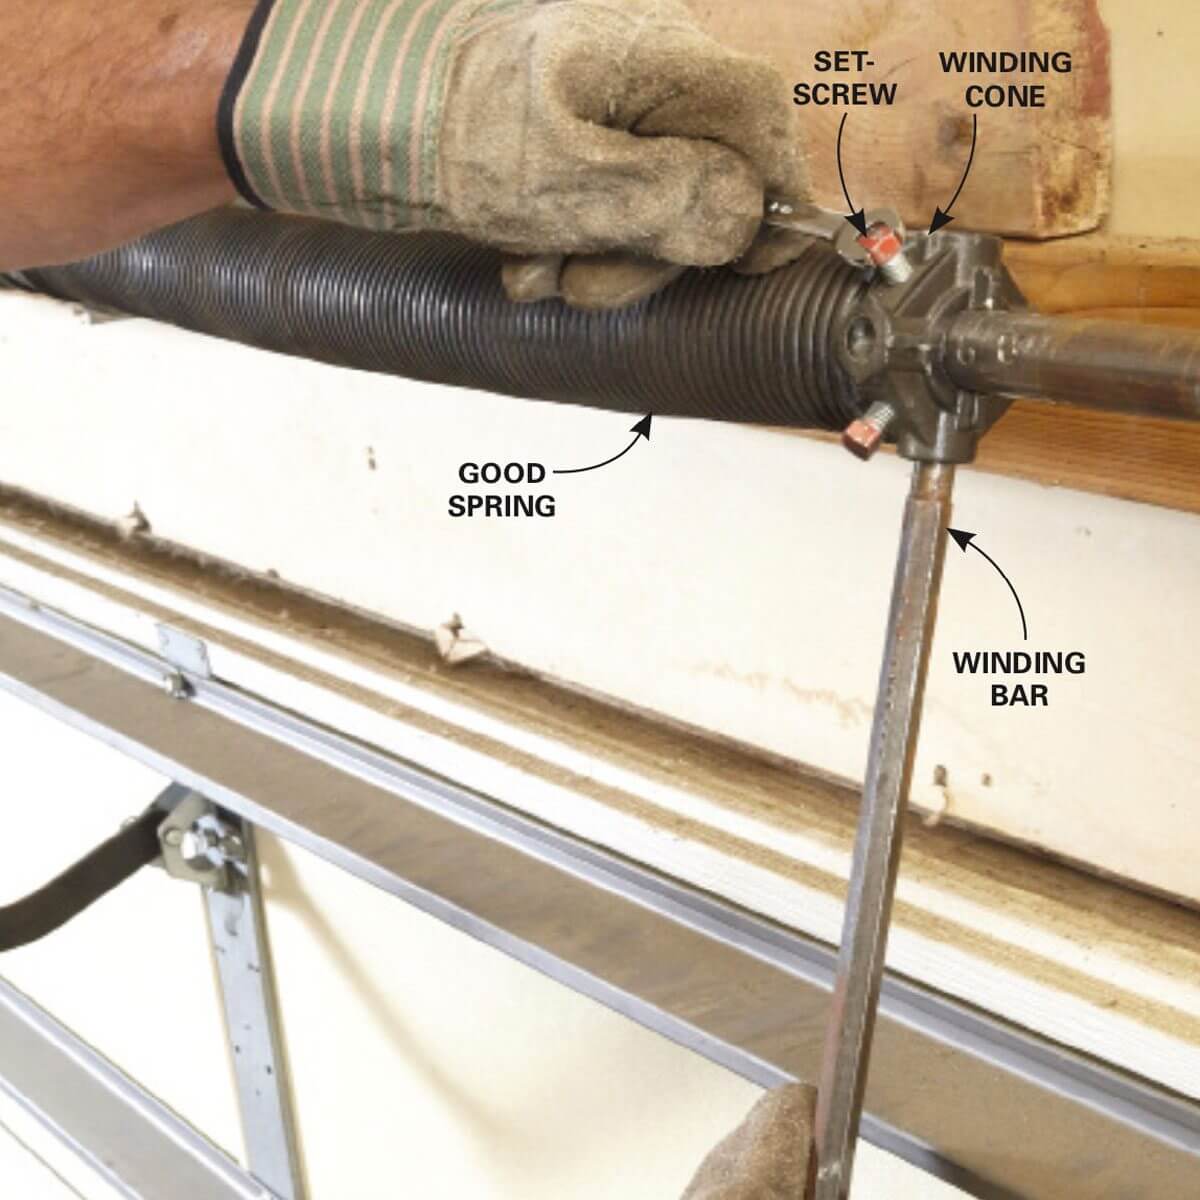
2. Loosening and Unwinding the Good Garage Door Spring
The second step is to loosen the good garage door spring using a winding bar. All you need to do here is to push it into the bottom hole of the spring.
Loosen the screws and hold the bar so that it won’t move. Make sure that you hold it well because the spring will give a strong push.
After that, you will need to slide the next winding bar in a straight position and remove the bottom bar. You will also need to unwind the spring with a quarter turn.
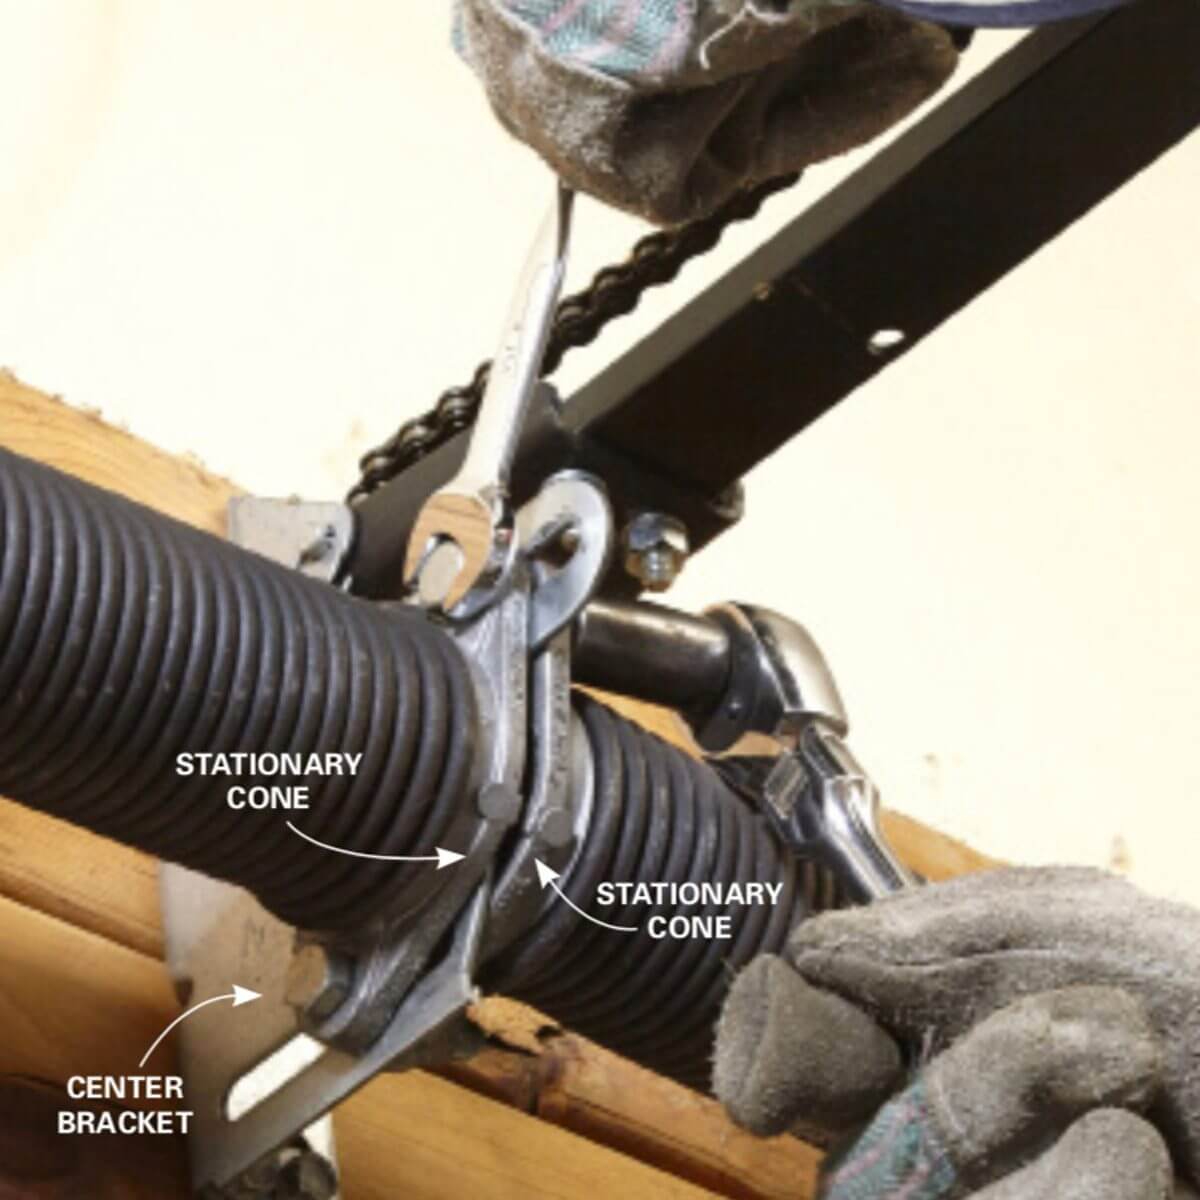
3. Disconnecting the Springs and Securing the Torsion Tube
In this step, you will need to revolve the bolts and nuts from the center brackers to disconnect the spring. Then, hold the torsion tube by inserting the locking pliers into the center bracket. Loosen the screws that are located in the right and left lift cable drums and you will need to disconnect the cables.
4. Removing the Old Spring and Installing the Left Spring
Remove the cable drum by sliding the torsion tube to the right starting from the left side of the door. After that, you can slide off the old spring.
When the old spring is removed, you can install the new spring to the torsion tube. You also need to install the cable drum and the garage door wire, and reinsert the torsion bar on the left side.
5. Installing the New Center Bearing
You will need to connect the stationary cones with the bracket by sliding the torsion bar to the center bearing. Then, install the right spring and shove the bearing to the stationary cone.
Install the drum and you can connect both of the stationary cones. You can now remove rusty parts and change them into new ones using cordless drill.

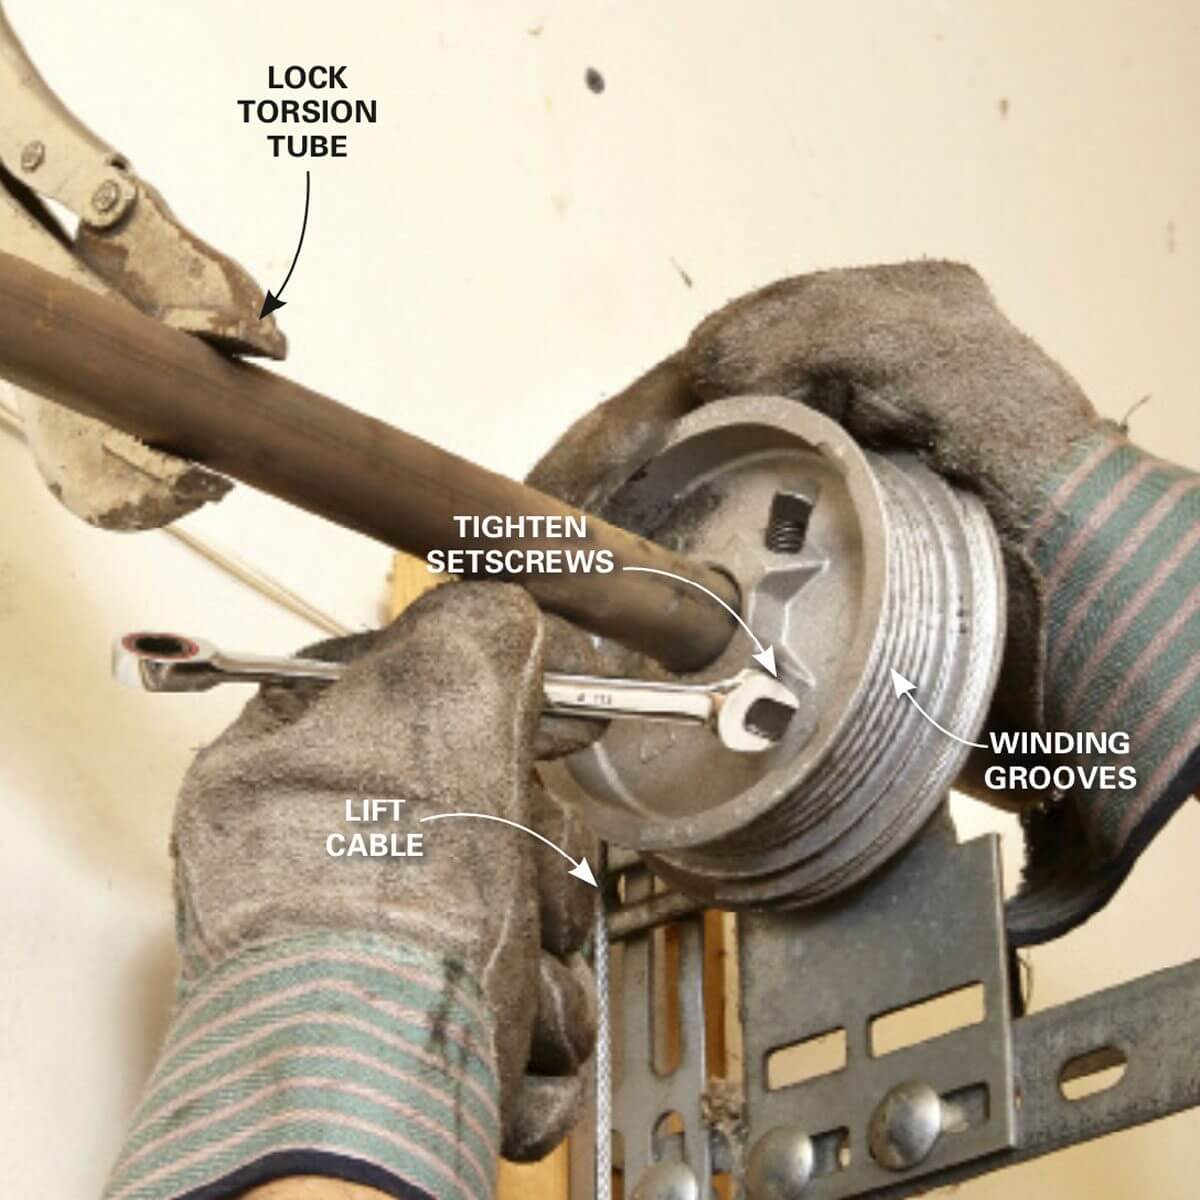
6. Inserting Cables and Tightening Drums
After you have removed the rusty parts, you can insert the cables into the cable slot. To do this, you need to operate the lift cables between the doorjamb and the rollers, then you can slide the lift cable stop to the drum.
You will need to tighten the set screws of the winding grooves using locking pliers. Make sure that you pull the cable tightly before you tighten the set screws. Then, repeat the same process with the other side to have equal tension for the door.
7. Winding Tension Spring
Using the winding bar, wind the cone toward the ceiling. Do it for 30 quarter turns or 36 quarter turns depending on the garage door height. If you are not sure, you can ask for the recommendation of the spring supplier.

Image: familyhandyman.com
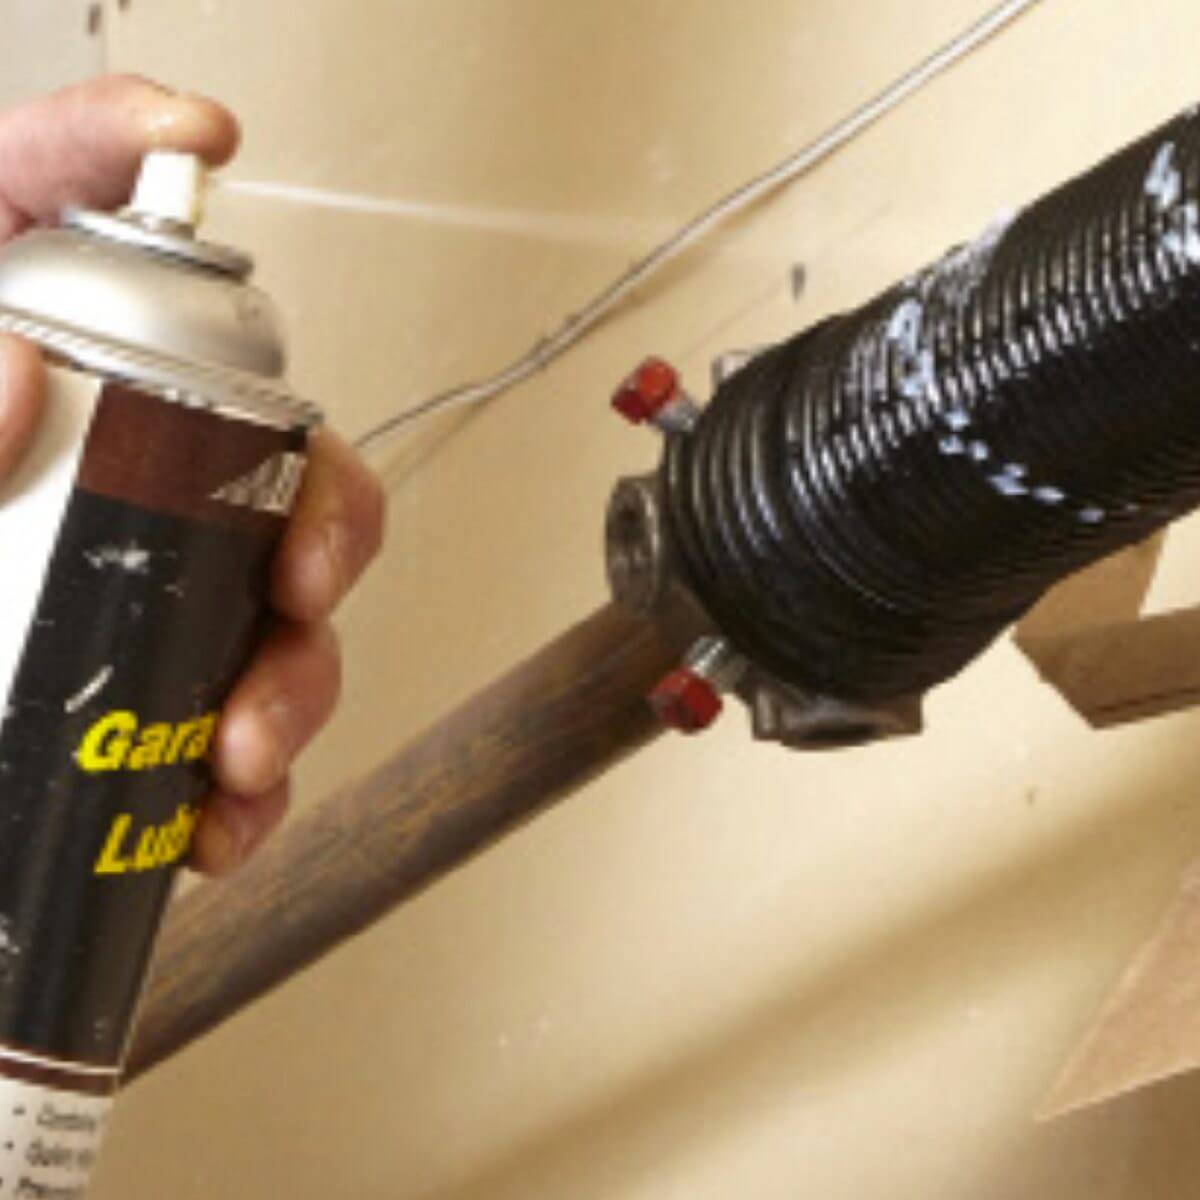
8. Finishing the Installation
The final step for this installation is to stretch the spring using the winding bar. You need to do it before tightening the set screws. After that, you need to lubricate the spring using the garage door lube spray.
But, you need to protect the wall by inserting a piece of cardboard in the space between the spring and the wall. Then, wipe the excess spray.
When to Call a Professional
You don’t need to break a sweat if you are not sure whether you can install the garage door spring by yourself or not. You need to remember that this project can be very dangerous and there will be some things that go in the way if you are not careful enough.


