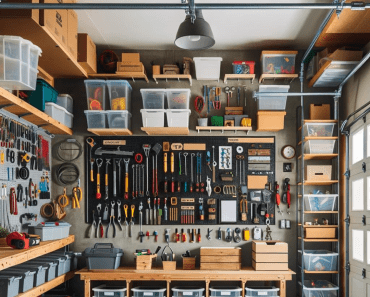
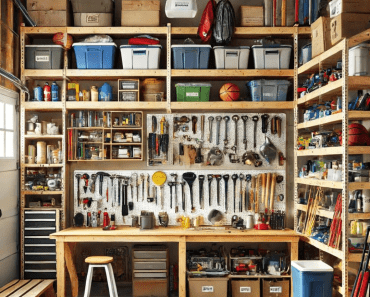
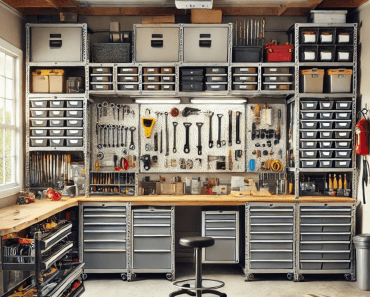
Is your garage cluttered and chaotic? 🚗🏡 It’s time to take control of the mess with some smart and stylish DIY wall shelves. In this guide, we’ll show you how to maximize your garage space, keep everything organized, and add some flair to your storage solutions. Get ready to transform your garage into a tidy and efficient workspace!

Why Choose DIY Wall Shelves for Garage Organization
DIY wall shelves are a fantastic solution for garage organization for several reasons. First and foremost, they help you make the most of your vertical space, freeing up valuable floor area for larger items like vehicles and workbenches. Additionally, custom DIY shelves can be tailored to fit your specific storage needs, allowing you to organize tools, equipment, and supplies efficiently.
Benefits of DIY Wall Shelves
One of the primary benefits of DIY wall shelves is their versatility. Whether you need to store small tools, large equipment, or seasonal items, you can design shelves that suit your needs perfectly. Moreover, creating your own shelves is a cost-effective alternative to purchasing pre-made storage solutions, giving you the freedom to choose materials and styles that match your garage’s aesthetic.
Another significant advantage is the satisfaction of building something with your own hands. DIY projects provide a sense of accomplishment and pride, knowing that you’ve created a functional and attractive storage solution for your home.
Planning Your DIY Wall Shelves Project
Before diving into your DIY wall shelves project, it’s essential to plan thoroughly. Proper planning ensures that your shelves are both functional and aesthetically pleasing, meeting your storage needs while enhancing the overall look of your garage.
Assessing Your Storage Needs
Start by taking an inventory of the items you need to store. This will help you determine the size, number, and type of shelves required. Consider grouping similar items together, such as tools, sports equipment, and gardening supplies, to streamline the organization process.
Table: Sample Inventory and Shelf Requirements
| Item Category | Examples | Shelf Type |
|---|---|---|
| Tools | Hammers, screwdrivers, power tools | Heavy-duty metal |
| Sports Equipment | Balls, bats, helmets | Deep wooden |
| Gardening Supplies | Pots, soil bags, gardening tools | Adjustable |
| Seasonal Items | Holiday decorations, camping gear | High shelves |
| Miscellaneous | Paint cans, cleaning supplies | Standard wooden |
Measuring Your Garage Space
Accurate measurements are crucial for a successful DIY wall shelves project. Measure the height, width, and depth of your garage walls, taking into account any obstacles such as doors, windows, and outlets. These measurements will guide the design and placement of your shelves.
Choosing Materials
The choice of materials depends on the weight and type of items you plan to store. Common materials for garage shelves include wood, metal, and plastic. For heavy items, metal shelves provide superior strength and durability, while wooden shelves offer a classic look suitable for lighter items. Consider using adjustable shelving brackets for added flexibility.
Building Your DIY Wall Shelves
With your plan in place, it’s time to start building your DIY wall shelves. This section will guide you through the construction process, from gathering tools and materials to installing the shelves on your garage walls.
Gathering Tools and Materials
Before you begin, gather all necessary tools and materials. Here’s a list of common items you’ll need:
- Measuring tape
- Level
- Stud finder
- Drill and drill bits
- Screws and anchors
- Saw (if cutting wood)
- Sandpaper (if using wood)
- Shelf brackets
- Shelving material (wood, metal, etc.)
Marking and Drilling
Start by marking the positions of your shelves on the garage wall. Use a level to ensure the markings are straight. Next, use a stud finder to locate wall studs, which provide the strongest support for your shelves. Mark the stud locations and drill pilot holes for your shelf brackets.
Installing Shelf Brackets
Secure the shelf brackets to the wall using screws and anchors. Make sure the brackets are level and firmly attached to the wall studs. The number of brackets required depends on the length and weight capacity of your shelves. Generally, it’s best to install brackets every 16 to 24 inches for optimal support.
Cutting and Preparing Shelves
If you’re using wood for your shelves, cut the boards to the desired length. Sand the edges and surfaces to smooth out any rough spots. If you prefer a finished look, consider painting or staining the wood before installation.
Mounting the Shelves
Once your brackets are in place and your shelves are prepared, it’s time to mount the shelves. Simply place the shelves on the brackets, ensuring they are level and secure. Use screws to attach the shelves to the brackets for added stability.
Customizing Your DIY Wall Shelves
Personalizing your DIY wall shelves can enhance both functionality and aesthetics. Here are some ideas for customizing your shelves to suit your needs and preferences.
Adding Hooks and Bins
Incorporate hooks and bins into your shelving system to maximize storage options. Hooks are perfect for hanging items like tools, extension cords, and bags, while bins provide a convenient way to store smaller items. Label the bins for easy identification and organization.
Creating Adjustable Shelving
Adjustable shelving allows you to modify the height and arrangement of your shelves as your storage needs change. Use adjustable shelf brackets or track systems to achieve this flexibility. This is particularly useful for accommodating items of varying sizes.
Enhancing Aesthetics
Don’t overlook the visual appeal of your DIY wall shelves. Consider painting the shelves in a color that complements your garage decor. You can also add decorative elements like trim or edge banding for a polished look. Lighting can also make a significant difference; installing LED strips under the shelves can brighten up your workspace and highlight your organizational efforts.
Important Note on Safety
“Always prioritize safety when working with tools and heavy materials. Wear appropriate protective gear, including gloves and safety glasses, and ensure your work area is well-ventilated.”
Maintenance Tips for DIY Wall Shelves
Once your DIY wall shelves are installed, maintaining them is key to ensuring their longevity and effectiveness. Regular maintenance will keep your garage organized and your shelves in top condition.
Regular Cleaning
Dust and dirt can accumulate on shelves over time, so regular cleaning is essential. Use a damp cloth to wipe down the surfaces, and consider using a mild cleaner for tougher stains. Keeping the shelves clean will also help you spot any potential issues early, such as warping or damage.
Inspecting for Wear and Tear
Periodically inspect your shelves for signs of wear and tear. Check for loose screws, brackets, or any damage to the shelving material. Address any issues promptly to prevent further damage and ensure the safety of your stored items.
Reorganizing and Updating
As your storage needs evolve, don’t hesitate to reorganize and update your shelves. Adjust the shelf heights, add new hooks or bins, and consider replacing any worn-out components. Keeping your shelving system adaptable will ensure it continues to meet your needs effectively.
Conclusion
Transforming your garage with DIY wall shelves is a rewarding project that offers numerous benefits. From maximizing your storage space to enhancing the overall look of your garage, these shelves are a practical and stylish solution. By planning carefully, choosing the right materials, and following the steps outlined in this guide, you can create a custom shelving system that meets your unique needs. So, roll up your sleeves, gather your tools, and get ready to turn your cluttered garage into an organized haven! 🚀🔨


