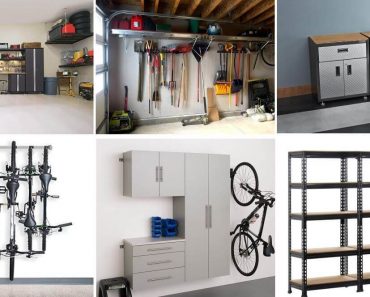
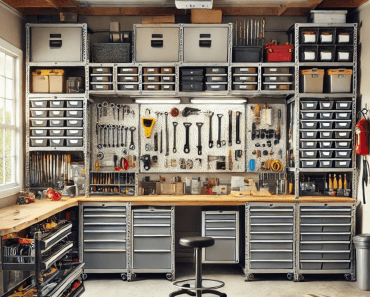
The garage is more than just a place to park your car. It’s a workshop, a storage area, and sometimes even a sanctuary. One of the most underutilized spaces in a garage is the overhead space. With the right overhead garage tool storage racks and shelves, you can transform your garage into an organized haven. In this comprehensive guide, we’ll delve deep into the world of overhead storage solutions, ensuring you make the most of every inch of your garage.

🌟 Benefits of Overhead Garage Tool Storage Racks and Shelves 🌟
1. Maximizes Space 📏
Overhead garage tool storage racks and shelves allow you to utilize the vertical space in your garage. This means you can store more tools and items without compromising on floor space.
Important Note: “Always ensure that the overhead storage solutions you choose can handle the weight of the items you plan to store.”
2. Keeps Tools Organized 🧰
With designated spots for each tool, you can easily find what you need when you need it. No more rummaging through boxes or drawers. Everything is visible and within reach.
3. Enhances Safety 🚫
By keeping tools off the floor, you reduce the risk of tripping hazards. Plus, overhead storage solutions are designed to securely hold tools, minimizing the risk of them falling.
🛍️ Buying Guide: Choosing the Right Overhead Garage Tool Storage Racks and Shelves 🛍️
Material Matters: Steel vs. Aluminum 🛠️
When it comes to durability and strength, steel racks and shelves are hard to beat. They can handle heavier loads and are resistant to wear and tear. On the other hand, aluminum is lighter and resistant to rust, making it a good choice for humid climates.
Important Note: “Always check the weight capacity of the storage solution before purchasing.”
Installation: DIY vs. Professional Help 🔧
While many overhead storage solutions come with DIY installation kits, it’s essential to assess your comfort level. If you’re not confident, it might be worth investing in professional installation.
Size and Configuration 📐
Consider the size of the items you’ll be storing. Do you need deep shelves or just shallow racks? Also, think about the configuration. Some systems allow for adjustable shelving, which can be a huge advantage as your storage needs change.
📋 Step-by-Step Installation Guide for Overhead Garage Tool Storage Racks and Shelves 📋
Installing overhead garage tool storage racks and shelves might seem daunting at first, but with the right tools and a systematic approach, you can set up your storage solution with ease. Here’s a detailed guide to help you through the process:
Step 1: Gather Necessary Tools 🛠️
Before you begin, ensure you have all the necessary tools on hand. This typically includes:
- A drill
- A stud finder
- A level
- Measuring tape
- Pencil or chalk for marking
- Appropriate screws and anchors
Important Note: “Always wear safety gear, including safety glasses and gloves, to protect yourself during the installation.”
Step 2: Measure Your Space 📏
- Measure the width and depth of the area where you want to install the storage solution.
- Consider the height of the items you’ll be storing to ensure there’s enough clearance.
Step 3: Locate Ceiling Joists with a Stud Finder 🔍
- Ceiling joists are the horizontal beams that support the weight of the ceiling.
- Using a stud finder, locate and mark the position of the joists. This is where you’ll anchor the racks or shelves for maximum support.
Step 4: Choose the Right Anchors ⚓
- Depending on your garage’s ceiling type and the weight of the items you’ll be storing, choose the appropriate anchors.
- For drywall ceilings with joists, use heavy-duty lag screws. For concrete ceilings, use concrete anchors.
Step 5: Mark the Anchor Points ✏️
- Hold up the rack or shelf against the ceiling in the desired position.
- Using a pencil or chalk, mark the points where you’ll drill holes for the anchors, ensuring they align with the ceiling joists.
Step 6: Pre-Drill Holes 🌀
- Pre-drilling holes ensures that your screws or anchors will go in smoothly and reduces the risk of damaging the ceiling.
- Use a drill bit slightly smaller than the size of your screws or anchors and drill where you’ve marked.
Step 7: Install the Racks or Shelves 🔩
- Align the mounting holes of your storage solution with the pre-drilled holes.
- Using the drill, secure the rack or shelf to the ceiling with the chosen screws or anchors.
- Ensure they are level and securely fastened.
Step 8: Double-Check Your Work 🔍
- Once installed, gently tug on the rack or shelf to ensure it’s securely anchored.
- Check with a level to ensure the storage solution is even.
Important Note: “For heavier items, it’s a good idea to distribute the weight evenly across the rack or shelf to prevent any strain on one particular area.”
Step 9: Load Your Tools and Items 📦
- Start by placing heavier items closer to the mounting points.
- Ensure that the weight distribution is even and doesn’t exceed the weight capacity of the storage solution.
Step 10: Regular Maintenance and Checks ⚙️
- Periodically check the screws and anchors to ensure they remain tight.
- Inspect the storage solution for any signs of wear or damage and address any issues immediately.
📊 Comparison Table: Top Overhead Garage Tool Storage Racks and Shelves 📊
| Brand | Material | Weight Capacity | Price |
|---|---|---|---|
| RackMaster | Steel | 500 lbs | $$$$ |
| ShelfiePro | Aluminum | 300 lbs | $$$ |
| OverheadGenius | Steel | 600 lbs | $$$$$ |
| SpaceSaver | Aluminum | 250 lbs | $$ |
🚀 Conclusion: Transform Your Garage Today 🚀
Overhead garage tool storage racks and shelves are game-changers. They help you maximize space, keep tools organized, and enhance safety. With the right storage solution, your garage can be more than just a place to park your car. It can be an organized, functional space that makes your life easier. So, don’t wait. Transform your garage today! 🌟🛠️🚗


